There are certain scenarios where Microsoft’s OneDrive/SharePoint solution is not an option for storing data (eg. data localization restrictions enforced by law). However, if you still want to provide your users with the file sync experience and/or other collaboration features you may have came across Owncloud or Nextcloud as an alternative. But have you considered publsihing it via Azure AD Application Proxy?
In this post, I will install a Nextcloud server on Ubuntu and integrate it with AzureAD and publish with the AzureAD Application Proxy service.
Prerequisites:
- custom DNS domain
- certificate for Nextcloud app (eg. nextcloud.f12.hu)
- VM for Nextcloud server, ubuntu server installer
- Windows Server VM for Application Proxy connector
- Azure AD Premium P1 licence (or other bundles including AAD P1)
TL;DR
- install a new Ubuntu server with nextcloud snap
- do the basic setup for nextcloud, including https
- from the App bundles install “SSO & SAML authentication”
- install Azure AD App Proxy connector on a Windows Server with direct line-of-sight on the Nextcloud server (HTTPS access should be enough)
- DNS setting (split brain DNS): the Windows Server with the App Proxy connector should resolve the FQDN of the app (eg.: nextcloud.f12.hu) to the private address of the Nextcloud server.
- on the Application proxy page – “Configure an app” – create the Nextcloud app and configure SAML SSO (there is a very good and detailed post on this by Nate Russel, I will cover the required steps too)
- configure SAML settings on the Nextcloud server (as per in the previous link or see below)
This post will NOT cover:
- proper storage configuration for Nextcloud and other design principles
- user matching with previously configured accounts in the Nextcloud environment
- preparing certificate
- Active Directory integration (AzureAD only)
Infrastructure basic setup
I’m not an Ubuntu expert, so I left everything as default/recommended during installation – only thing to mention here is that I chose to install the nextcloud snap. While waiting for installation, I created a DNS entry (nextcloud.f12.hu) pointing to the internal IP address of the Nextcloud server.
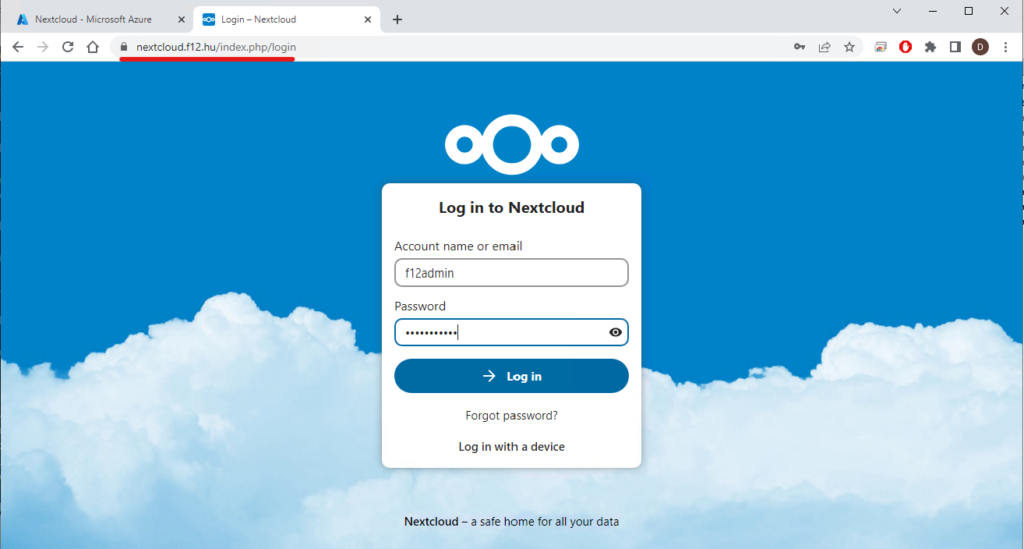
When the installation was ready, I navigated to the website (http://<ipaddress of the server>) and created the admin account:

Next step is to set up the listener (answer to nextcloud.f12.hu not only by IP).
nano /var/snap/nextcloud/current/nextcloud/config/config.php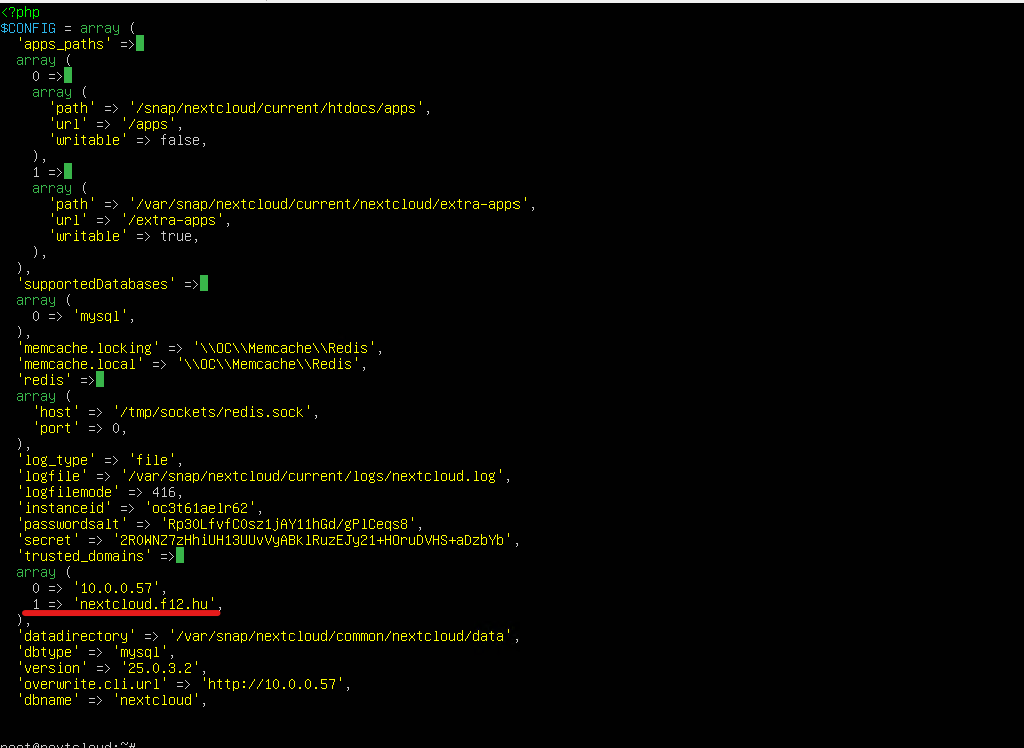
Upload the certificate, key and chain then enable https for nextcloud:
nextcloud.enable-https custom <cert> <key> <chain>
Now we are ready:
Now navigate to Apps – App bundles and install “SSO & SAML authentication” package
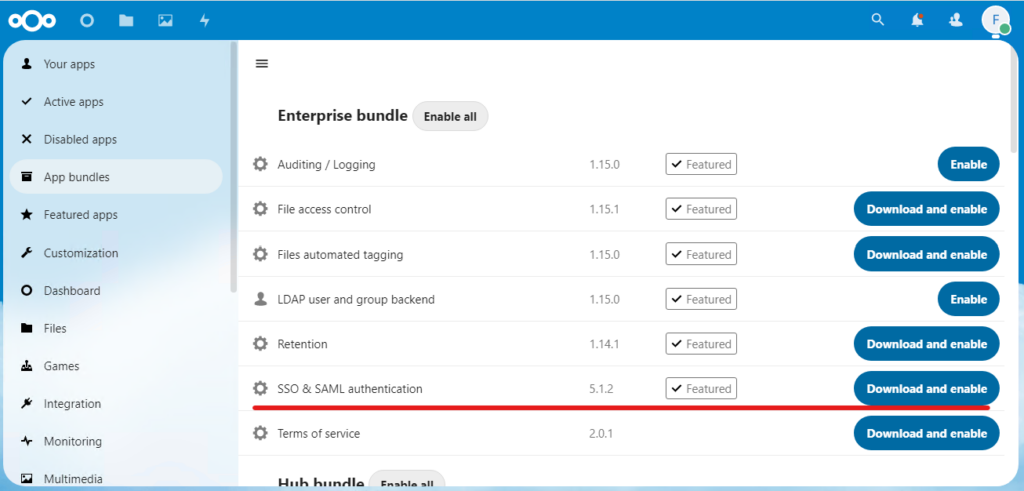
After that navigate to Settings – SSO & SAML authentication and select “Use built-in SAML authentication”

And stop here, but don’t close the browser window, we will come back soon.
Azure Active Directory configuration
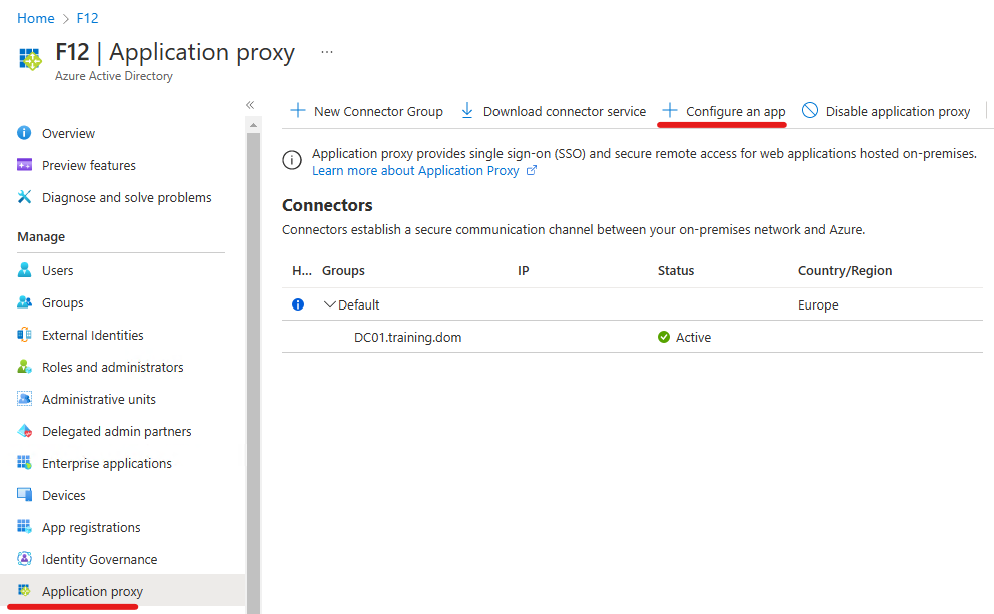
Navigate to portal.azure.com – Azure Active Directory – Application proxy. After downloading the connector and installing it on a Windows Server, the service is now enabled. (Very briefly: this server will be the proxy who will “receive the request” and translate the URL to the internal URL specified below. The trick is that the internal and the external URL is the same (this allows consistent user experience).
So click on Configure an app:
On the “Add your own on-premises application” enter the name and the URL values (reminder: internal and external URLs are the same) – and don’t forget to register the CNAME entry in the public DNS zone
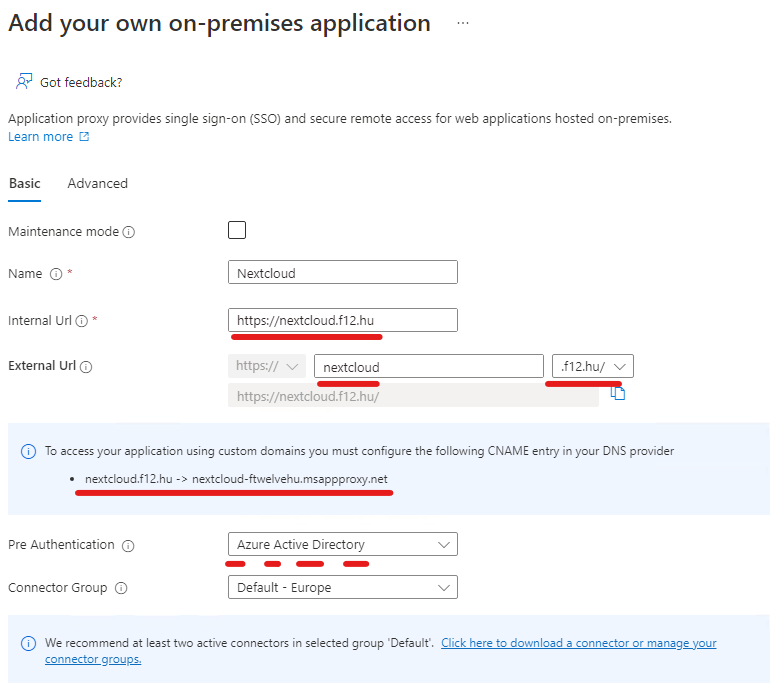
One sidenote: using Azure Active Directory Pre Authentication is fine until you are planning to access Nextcloud from browser only. If you need the sync client to work, this needs to be switched to Passthrough (with security considerations in mind).
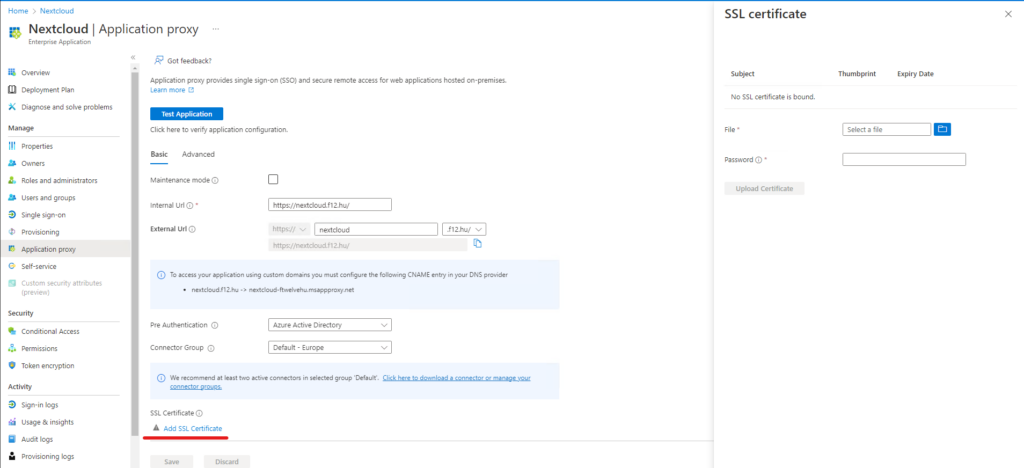
When ready, click Create then on the same screen you can upload the PFX certificate
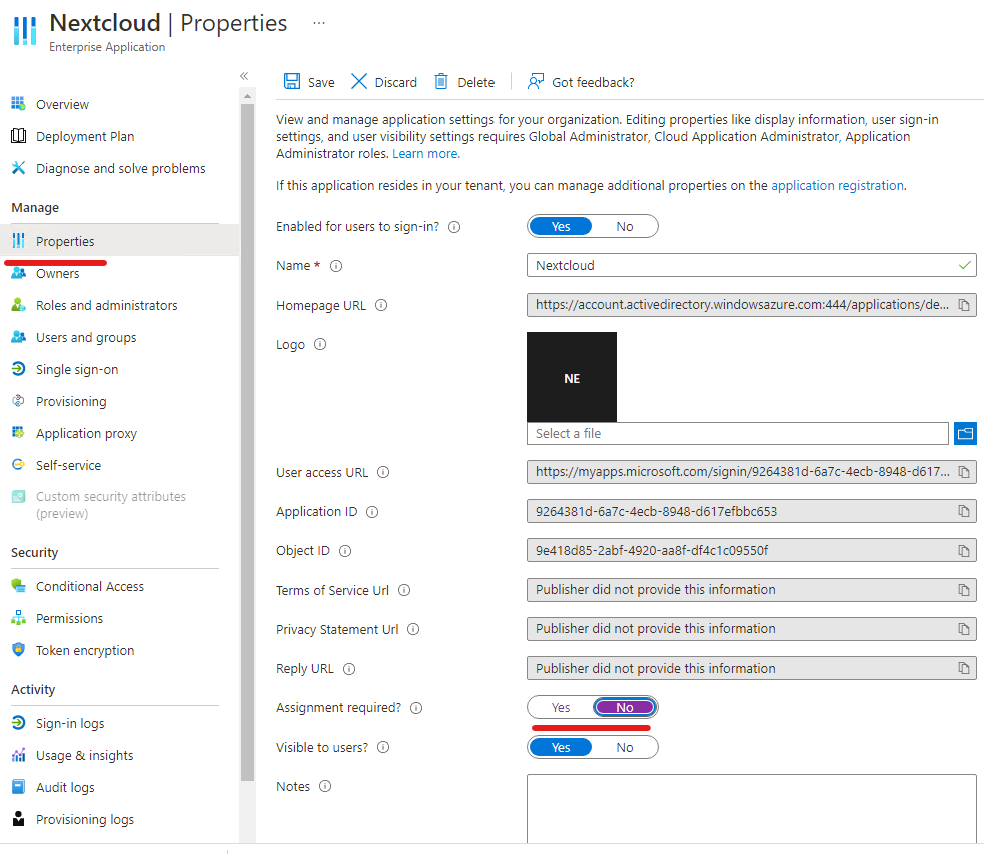
Next, take care of assignments – you can either assign it to a set of users (Users and groups tab) or in the Properties tab, you can set the “Assignment required” setting to No
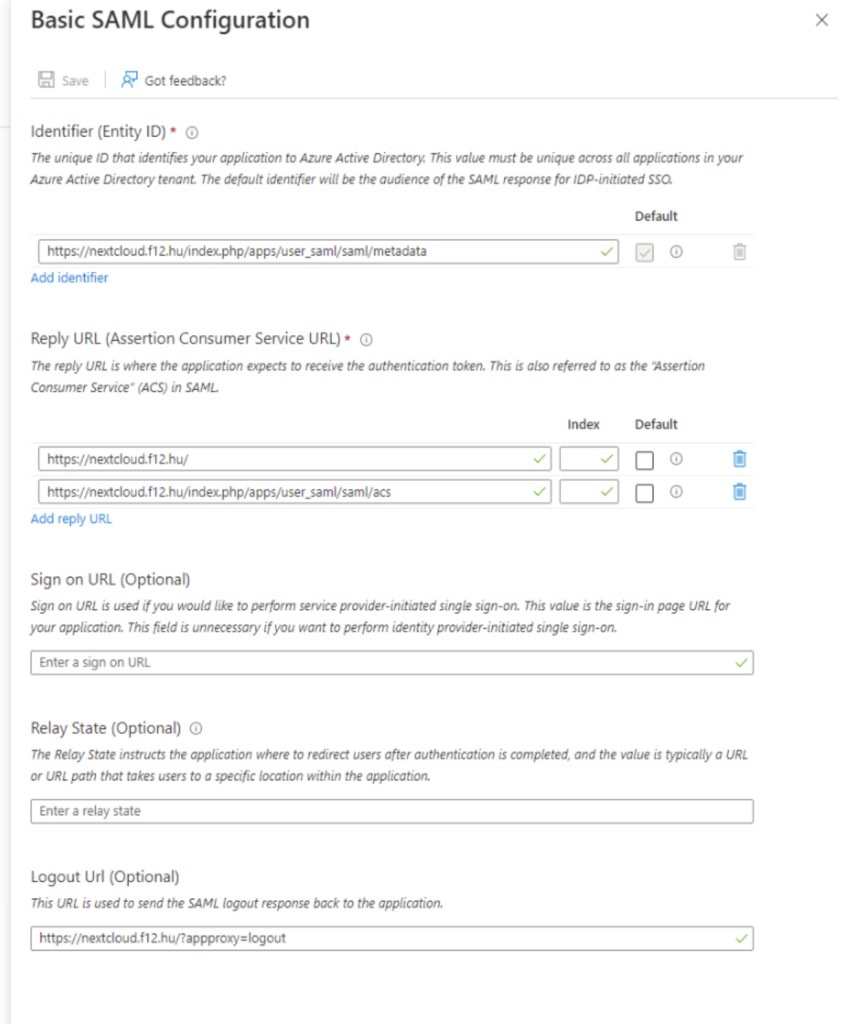
Next, click on Single sign-on and select SAML authentication. The Basic SAML Configuration blade should include the Entity ID and the Reply URL(s) with the following values:
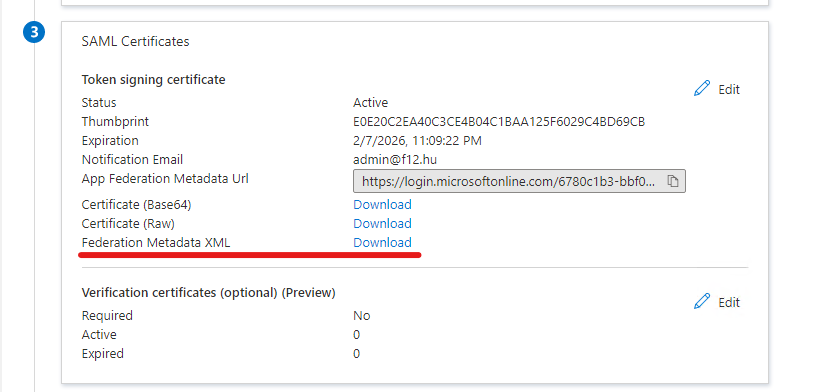
On the SAML certificates blade you can either download the Federation Metadata XML and copy the value if the <X509Certificate> tag as per in the tutorial linked above or you can download the Base64 encoded certificate, open it with notepad and remove the –BEGIN CERTIFICATE–, –END CERTIFICATE– lines and the linebrakes. Either way, this certificate will be needed on the Nextcloud SAML configuration.
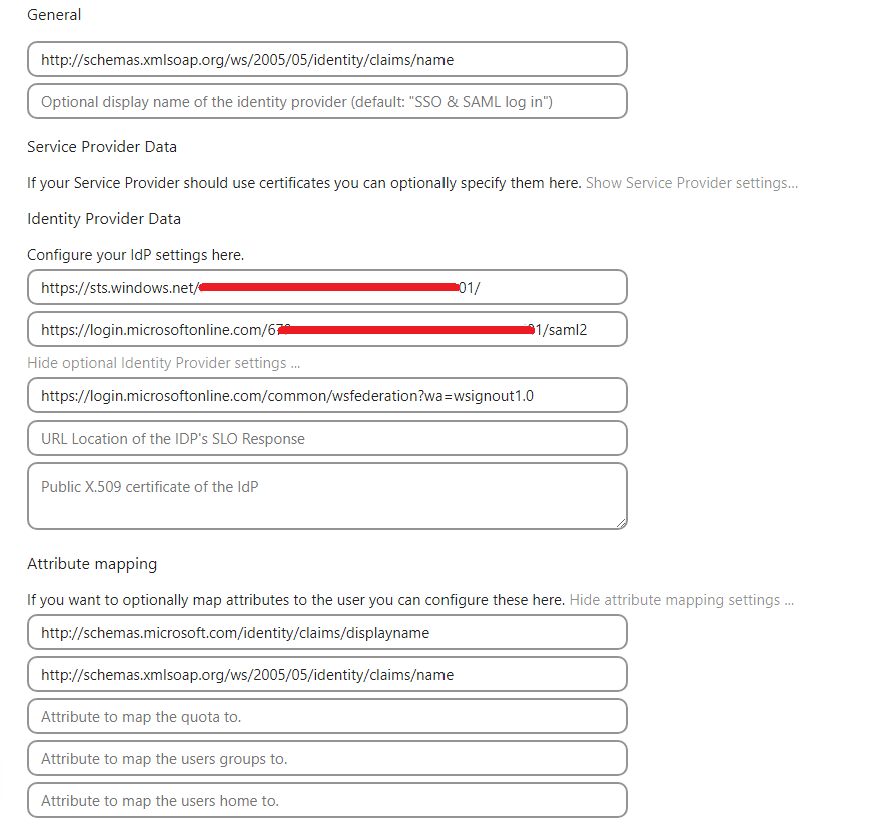
Now that we have the certificate, navigate back to the Nextcloud SAML settings and fill in the values as per in the tutorial of Nate
And the final step is to enable SAML:
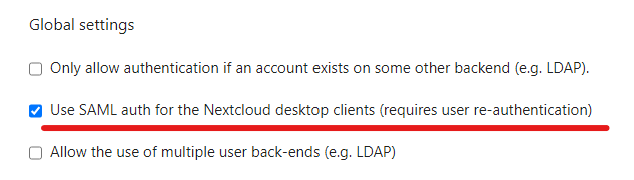
Now when we navigate to the Nextcloud server’s URL we will be redirected to the Microsoft login portal and that’s it. (Hint: as it is an Enterprise application you can apply Conditional Access policies to make it more secure, just keep in mind the considerations mentioned above about Passthrough pre-authentication)