AzureAD Powershell is planned for deprecation (link) so I redesigned my Conditional Access Policy Backup solution originally posted here. This v2 edition uses an AzureAD app registration for unattended access (eg. scheduled script) and the Microsoft Graph API (but not the Microsoft Graph PowerShell module).
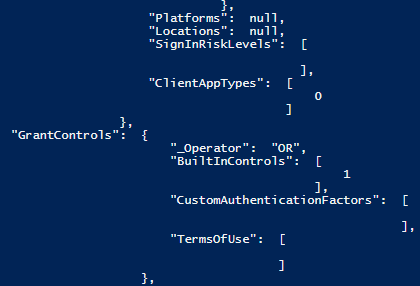
The idea and the logic is the same as in the previous version: Conditional Access Policies can be exported as JSON and if the policy in AzureAD differs from or latest version then we need an “incremental” backup.
TL;DR
– Create an app registration with Policy.Read.All Application permission (and grant admin consent) and a client secret (don’t forget to update the secret in the script before it expires)
– Copy the script below, fill the variables $tenantID, $appID,$appSecret (and $backupDir if you want it elsewhere)
– Schedule the script (based on my testing, SYSTEM/LOCAL SERVICE can’t be used for REST calls, so I’m using a user account for this purpose – to be fixed)
– If you need a “full backup” you can run the function Backup-AADCAs without the -ChangedOnly parameter
AzureAD App registration
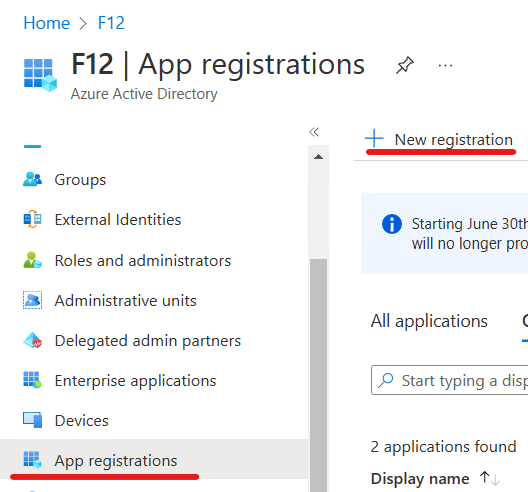
In AzureAD go to App registrations and click on New registration:
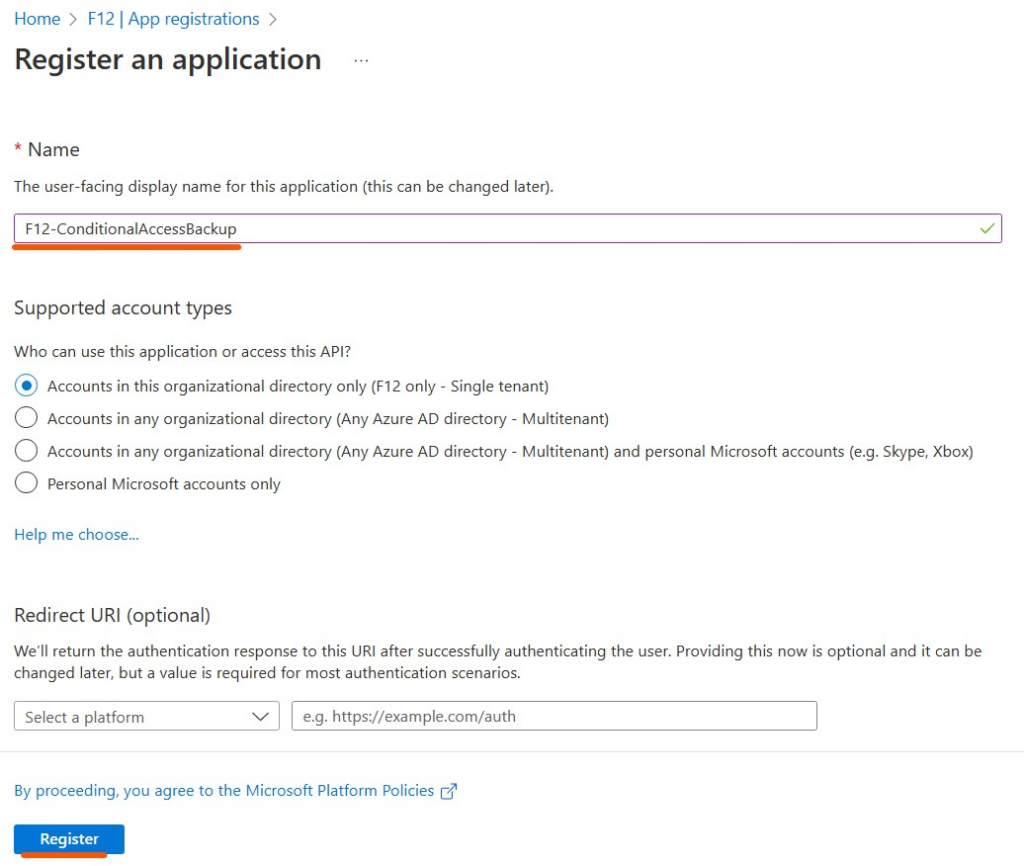
Give the app a name and click on Register:
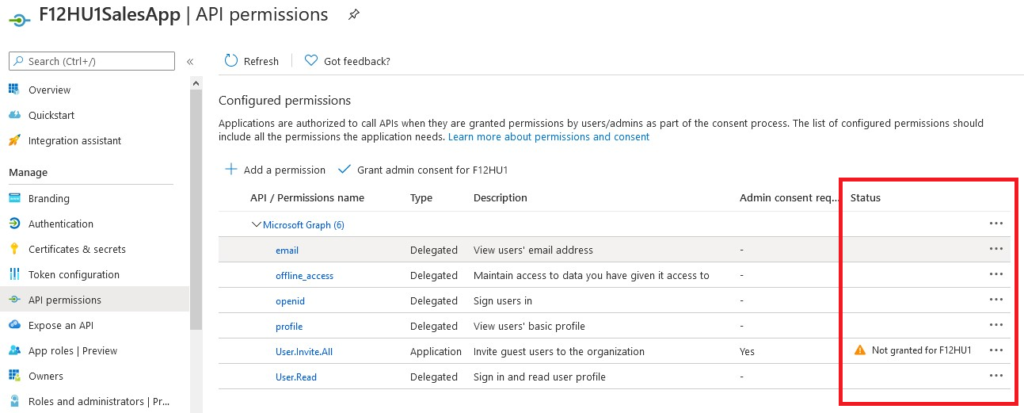
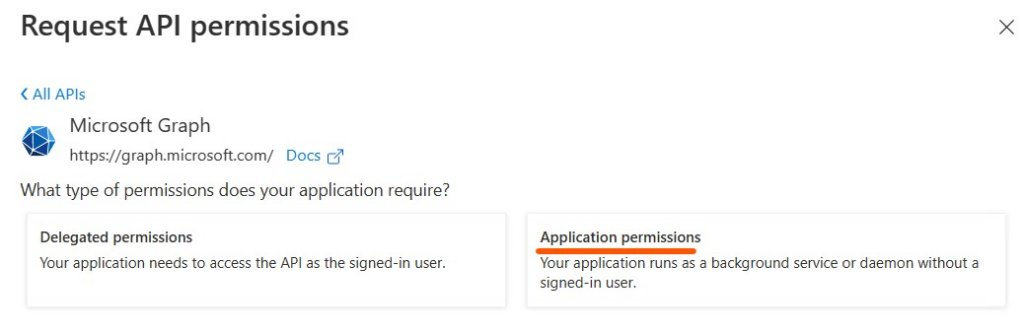
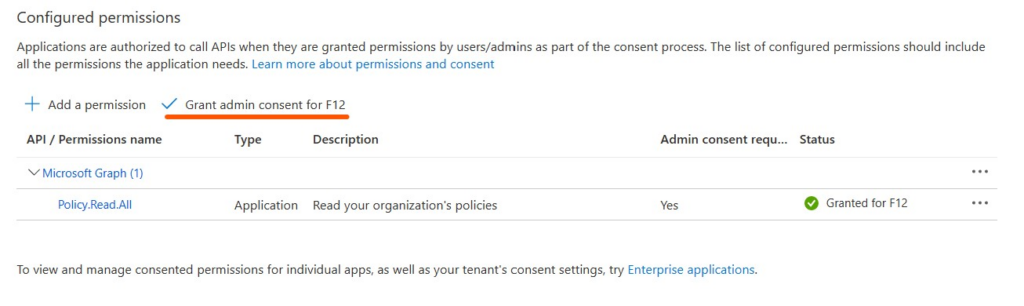
On the app registration page navigate to API permissions – Add a permission – Microsoft Graph – Application permissions
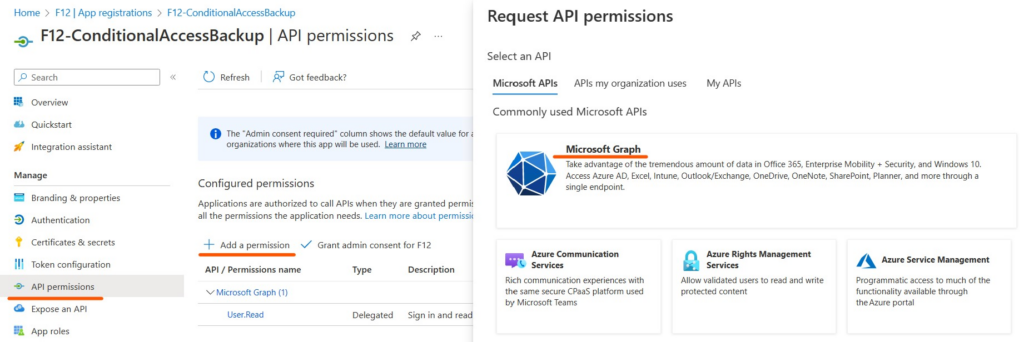
Add Policy.Read.All permission

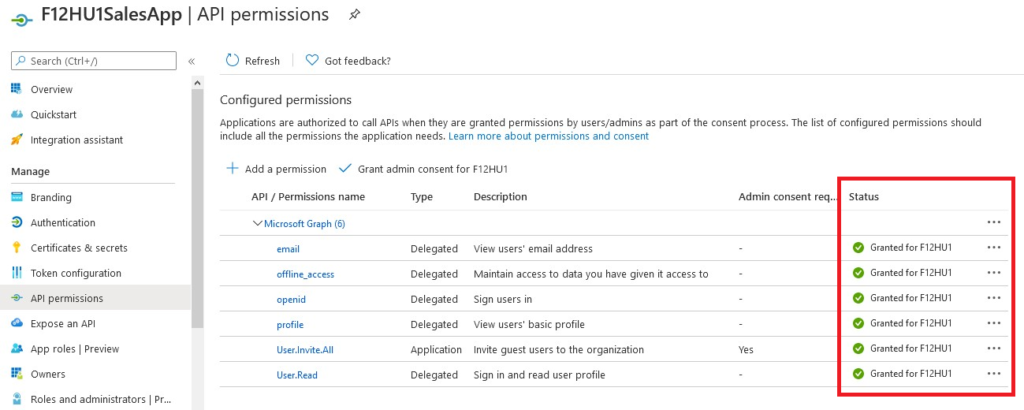
You can remove the default User.Read permission, then grant admin consent for Policy.Read.All
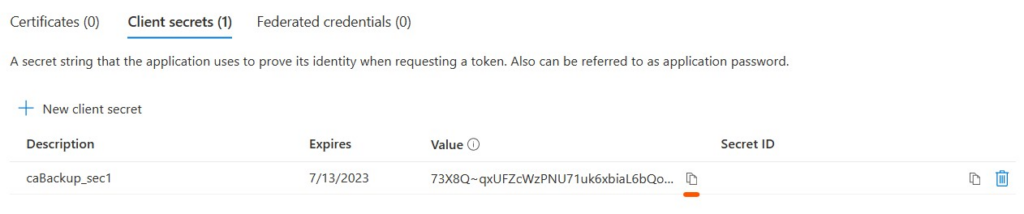
Navigate to Certificates & secrets – New client secret – create a new secret (don’t forget to refresh the secret in the script before it expires)
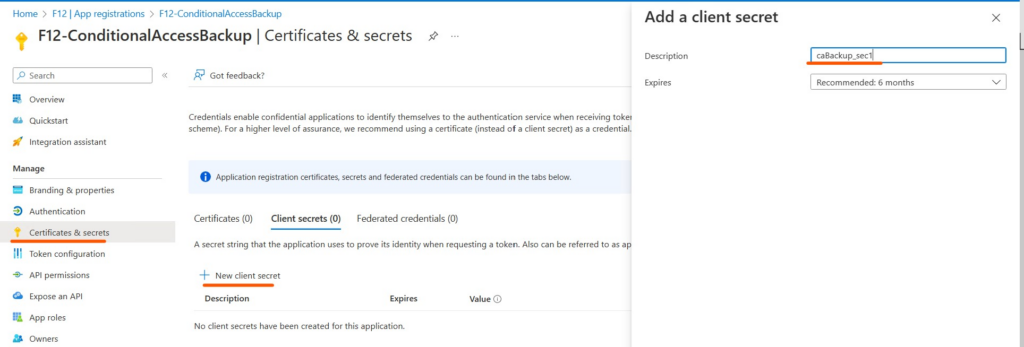
Copy the client secret (use the copy button) and insert it in the $appSecret variable in the script
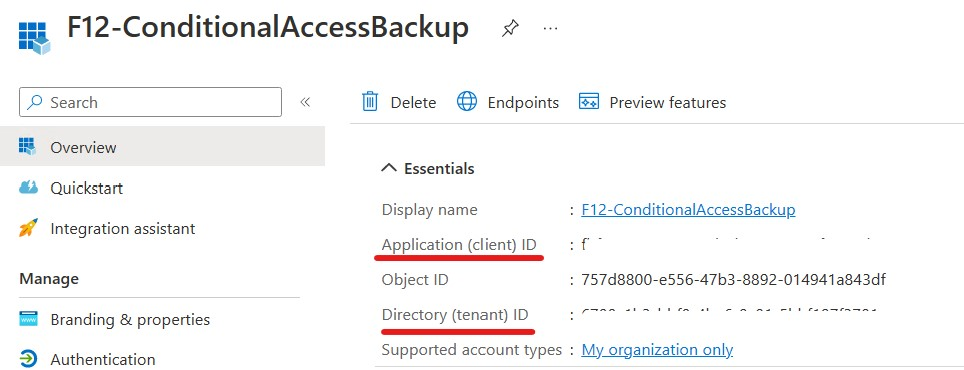
Head back to Overview, copy the tenant ID to $tenantID and application (client) ID to $appID
Schedule the scipt according to your needs.
Script
$backupDir = "C:\AAD_CA_Backup"
[Net.ServicePointManager]::SecurityProtocol = [Net.SecurityProtocolType]::Tls12
$tenantID = '' #tenantID
$appID = ''#appID
$appSecret = '' #appSecret
$scope = 'https://graph.microsoft.com/.default'
$oAuthUri = "https://login.microsoftonline.com/$TenantId/oauth2/v2.0/token"
$body = [Ordered] @{
scope = "$scope"
client_id = "$appId"
client_secret = "$appSecret"
grant_type = 'client_credentials'
}
$response = Invoke-RestMethod -Method Post -Uri $oAuthUri -Body $body -ErrorAction Stop
$aadToken = $response.access_token
#Conditional Access policies web request body
$url = 'https://graph.microsoft.com/v1.0/identity/conditionalAccess/policies'
$headers = @{
'Content-Type' = 'application/json'
'Accept' = 'application/json'
'Authorization' = "Bearer $aadToken"
}
function Import-AADCABackups {
gci -File -Recurse $backupDir -Include *.json | % {
[pscustomobject]@{
ID = ($_.Name.Split("_"))[0]
Version =[datetime]::ParseExact( ($_.BaseName.Split("_"))[1], 'yyyyMMddHHmm', $null)
JSON = Get-Content $_.FullName #| ConvertFrom-Json
Name = (Get-item $_.Directory).Name
}
}
}
function Backup-AADCAs {
Param(
[Parameter(Mandatory=$false)]
[switch]$ChangedOnly
)
$import_CABackups = Import-AADCABackups
$AAD_CAs = Invoke-WebRequest -Method Get -Uri $url -Headers $headers -ErrorAction Stop | ConvertFrom-Json | % {$_.value}
$strDate = Get-date -Format yyyyMMddHHmm
foreach ($CA in $AAD_CAs){
#create backup directory if it does not exist
if (!(Test-Path "$backupDir\$($CA.displayname)")){New-item -ItemType Directory -Path "$backupDir\$($CA.displayname)" >> $null }
#load JSON
$CA_JSON = $CA | ConvertTo-Json -Depth 6 -Compress
#Export changes only
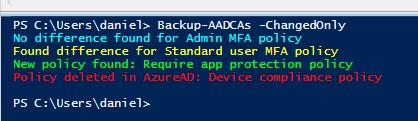
if ($ChangedOnly){
$import_CABackup_latest_JSON = ($import_CABackups | where({$_.ID -eq $CA.id}) | sort version | select -Last 1).JSON
#New CA
if ($import_CABackup_latest_JSON -eq $null){
Write-Host "New policy found: $($CA.DisplayName)" -ForegroundColor Green
Out-File -InputObject $CA_JSON -Encoding utf8 -FilePath "$backupDir\$($CA.displayname)\$($ca.id)_$strdate.json"
}
#Difference found
if (([bool]$import_CABackup_latest_JSON) -and ($import_CABackup_latest_JSON -ne $CA_JSON)){
Write-Host "Found difference for $($CA.DisplayName)" -ForegroundColor Yellow
Out-File -InputObject $CA_JSON -Encoding utf8 -FilePath "$backupDir\$($CA.displayname)\$($ca.id)_$strdate.json"
}
#No difference found
if (([bool]$import_CABackup_latest_JSON) -and ($import_CABackup_latest_JSON -eq $CA_JSON)){
Write-Host "No difference found for $($CA.DisplayName)" -ForegroundColor Cyan
}
#Export all
}else{
Out-File -InputObject $CA_JSON -Encoding utf8 -FilePath "$backupDir\$($CA.displayname)\$($ca.id)_$strdate.json"
}
}
#Deleted CA
$import_CABackups | ? {$_.id -notin $AAD_CAs.id} | % {
Write-Host "Policy deleted in AzureAD: $($_.Name)" -ForegroundColor Red
}
}
Backup-AADCAs -ChangedOnly